Workspaces
Listing Workspaces
- Go to the homepage by clicking the application logo in the top left corner.
- You can see your workspaces and perform actions:
- To delete a workspace, click the red trash can icon and confirm.
- To view workspace installation logs, click the file icon in the
Actionscolumn.
Creating a New Workspace
- On the homepage, click the
Create new workspacebutton. - Choose the correct origin for the workspace.
Blueprint
This origin contains blueprints available to you. A blueprint defines workspace parameters, preinstalled dependencies, and network permissions. Blueprints are predefined by the system administrator. If you don't see a blueprint you should have access to, contact your administrator.
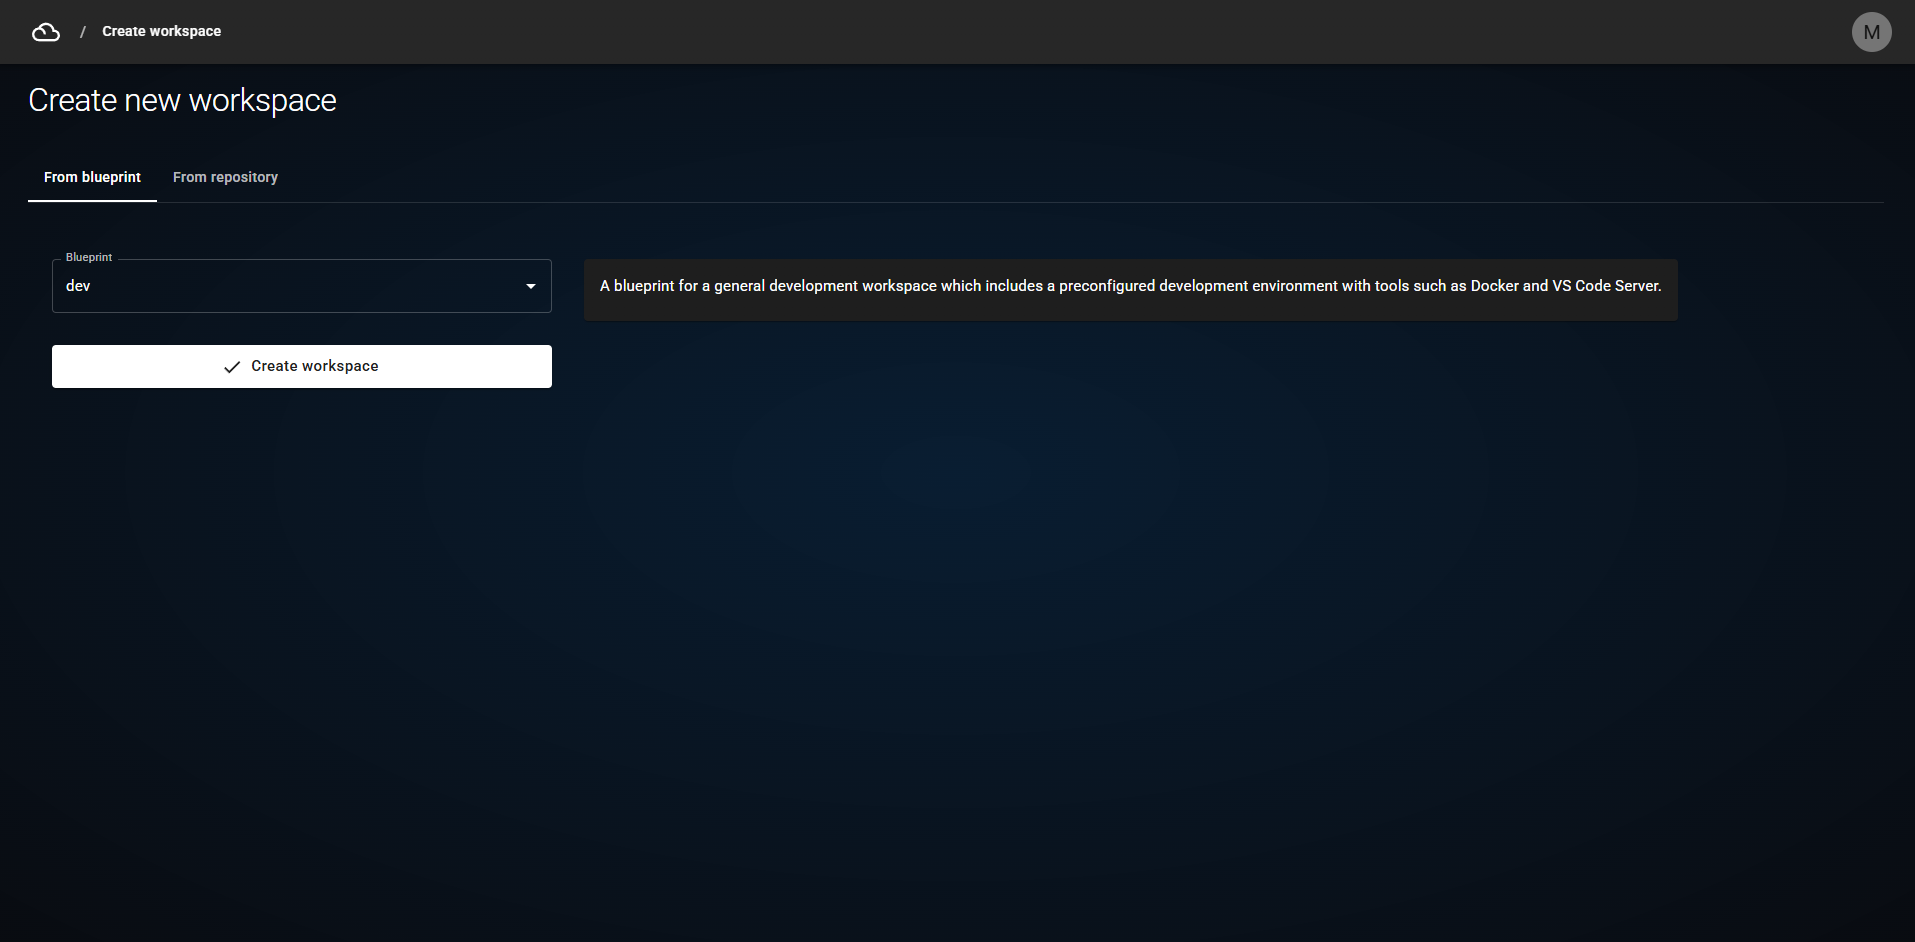
- Choose a blueprint from the dropdown menu.
- Click
Create workspace.
Git Repository
This origin lets you create a workspace pre-loaded with a specified Git repository.
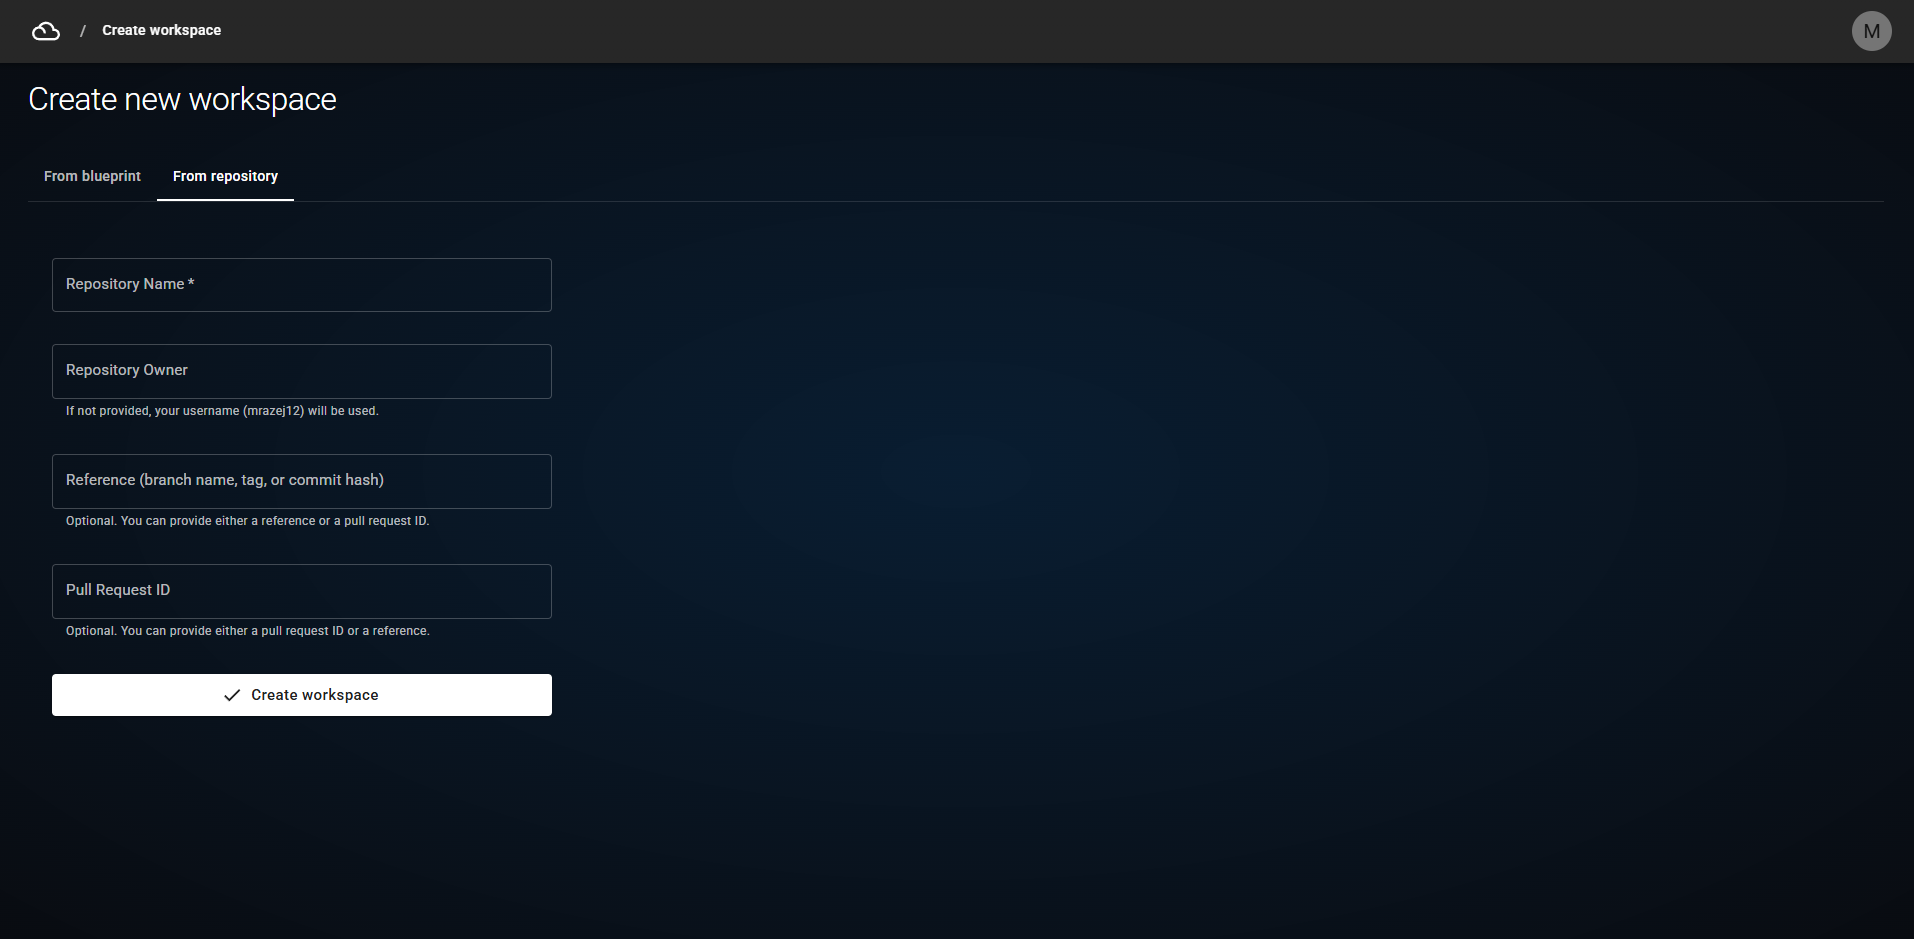
- Fill out the form:
- Repository name — the only mandatory field. Enter the repository name from Git.
- Repository owner — the group or username that owns the repository. Leave blank if the repository is under your own Git namespace.
- Reference — a commit SHA, tag, or branch name. Defaults to
mainif left blank. - Pull Request ID — the ID of a pull request (merge request) from the Git provider (GitLab, GitHub).
- Click
Create workspace.
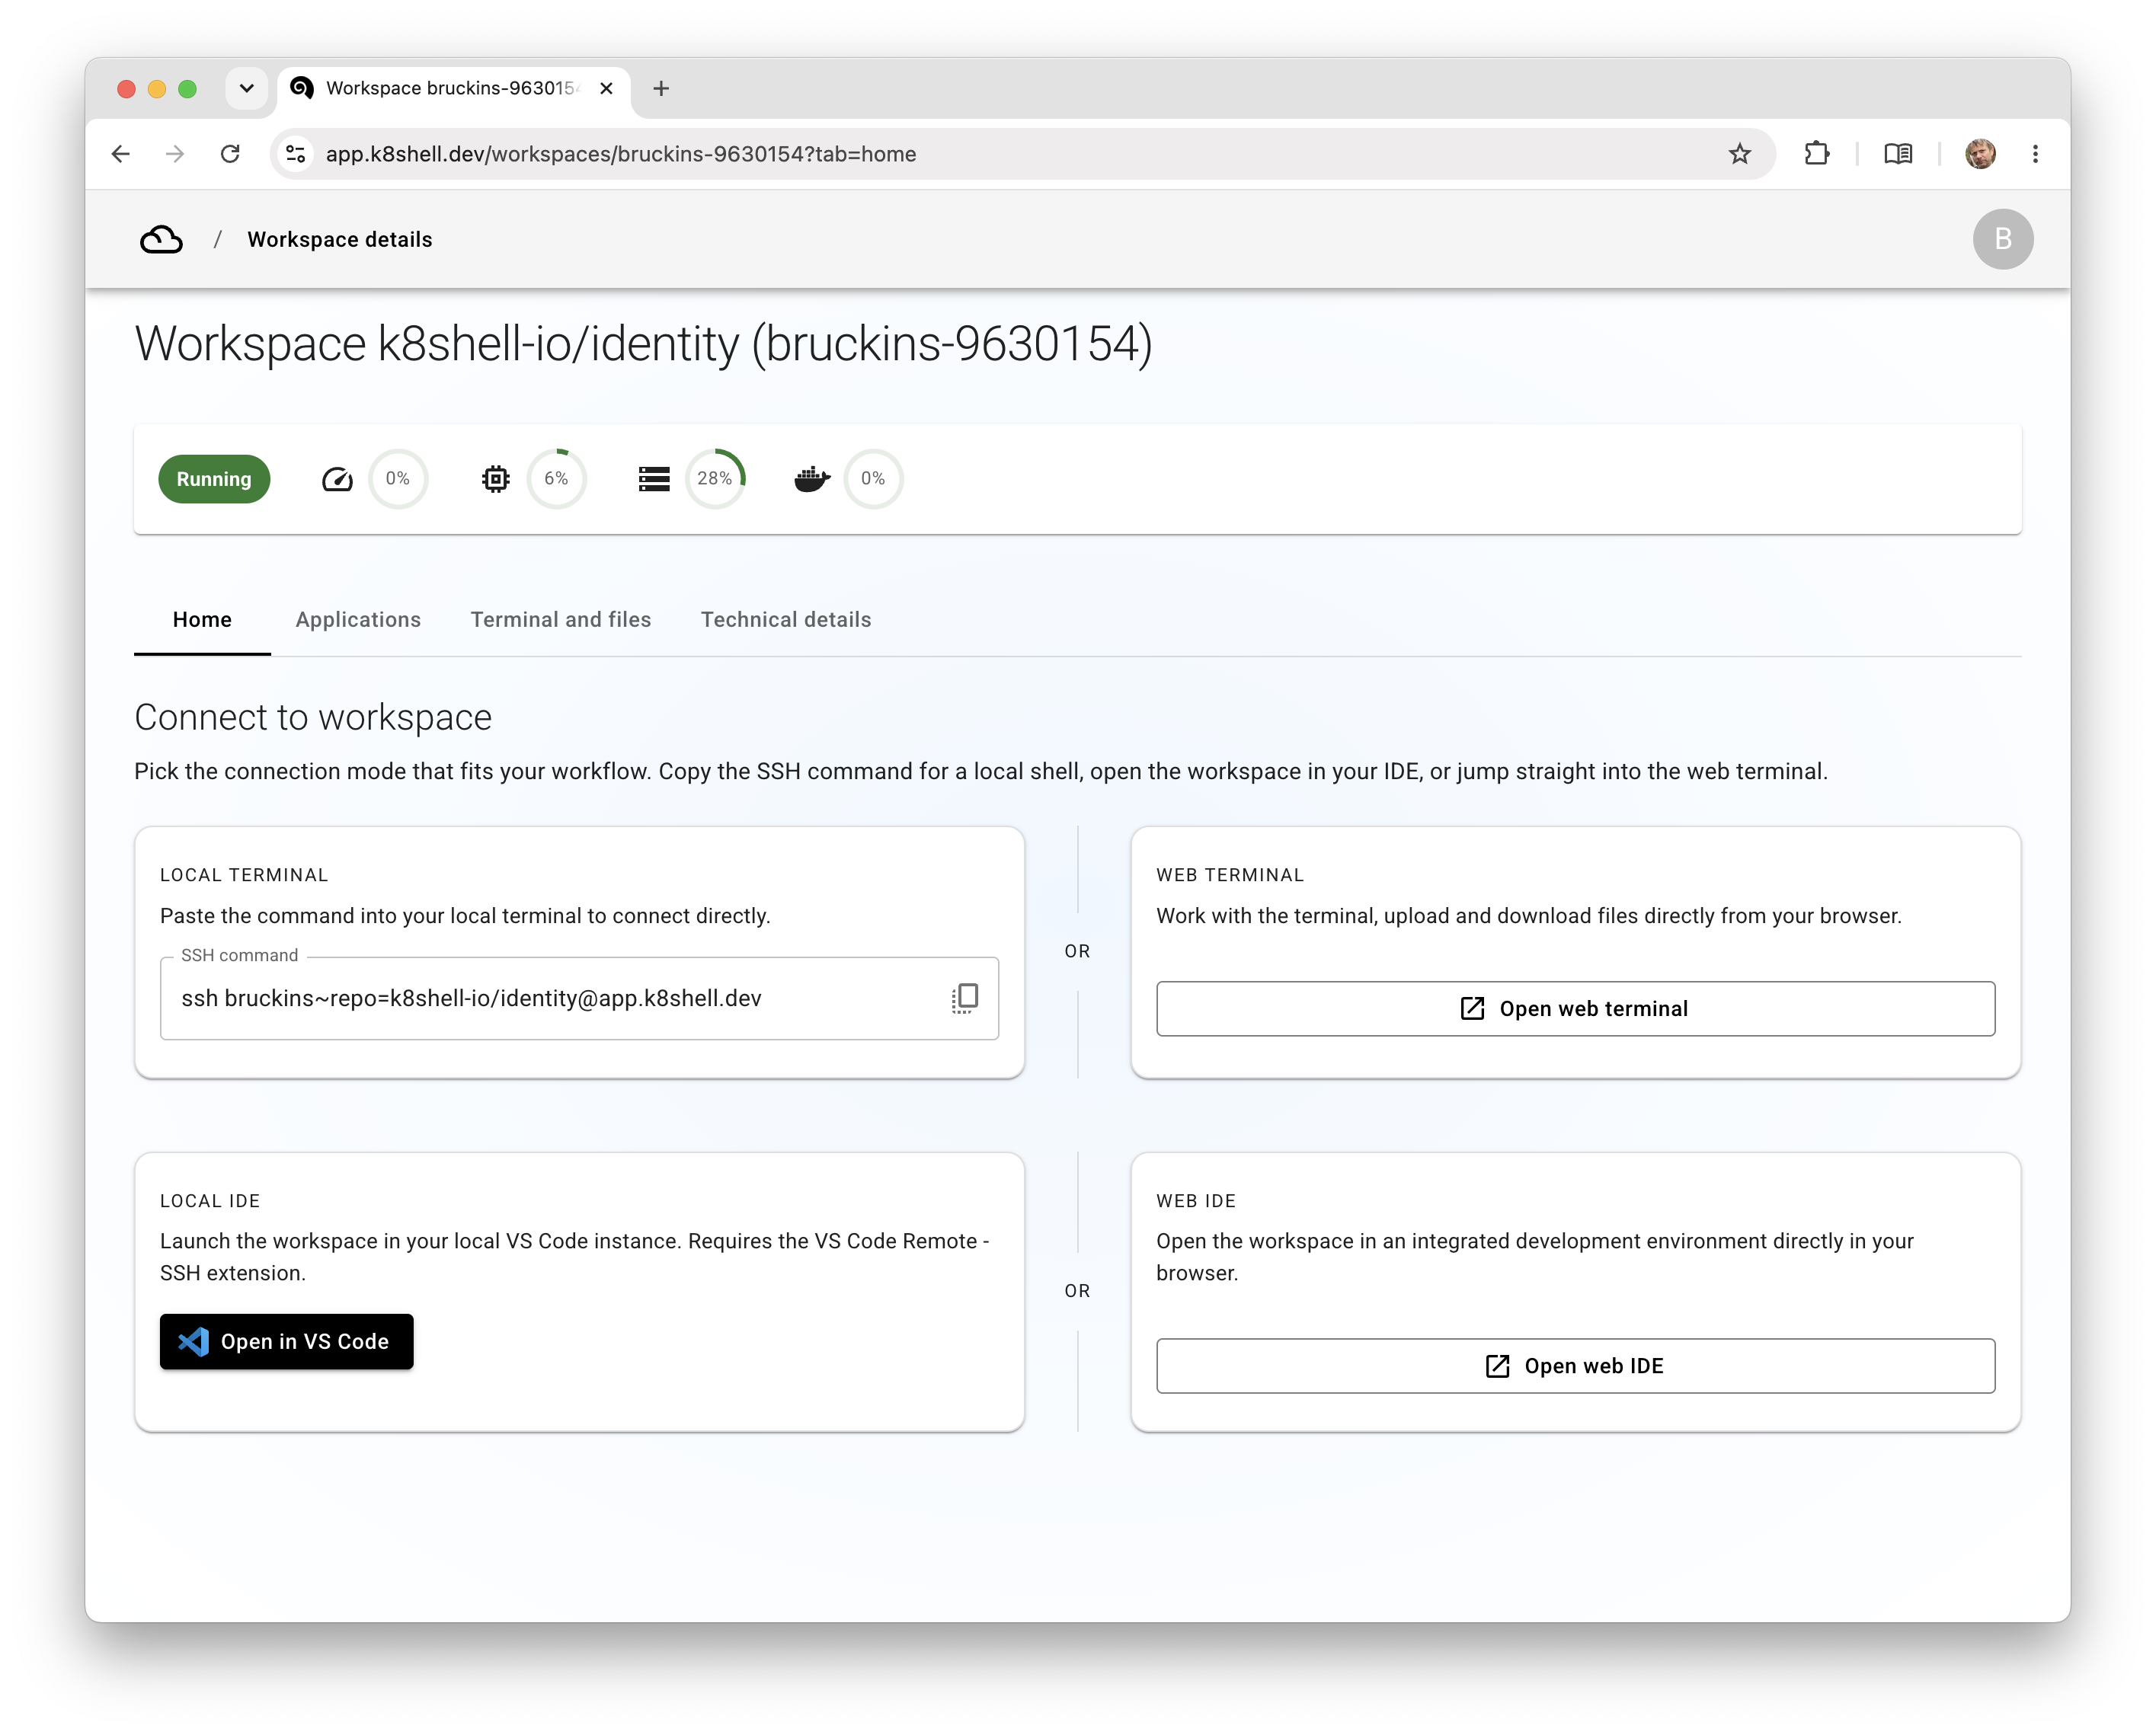
Interacting with a Workspace
- On the homepage, click the workspace
Originto open its detail page. - Use the tabs to switch between Applications, Terminal and files, and Technical details.
- A quick resource overview is shown below the heading on every workspace page.
Applications
-
Select the
Applicationstab.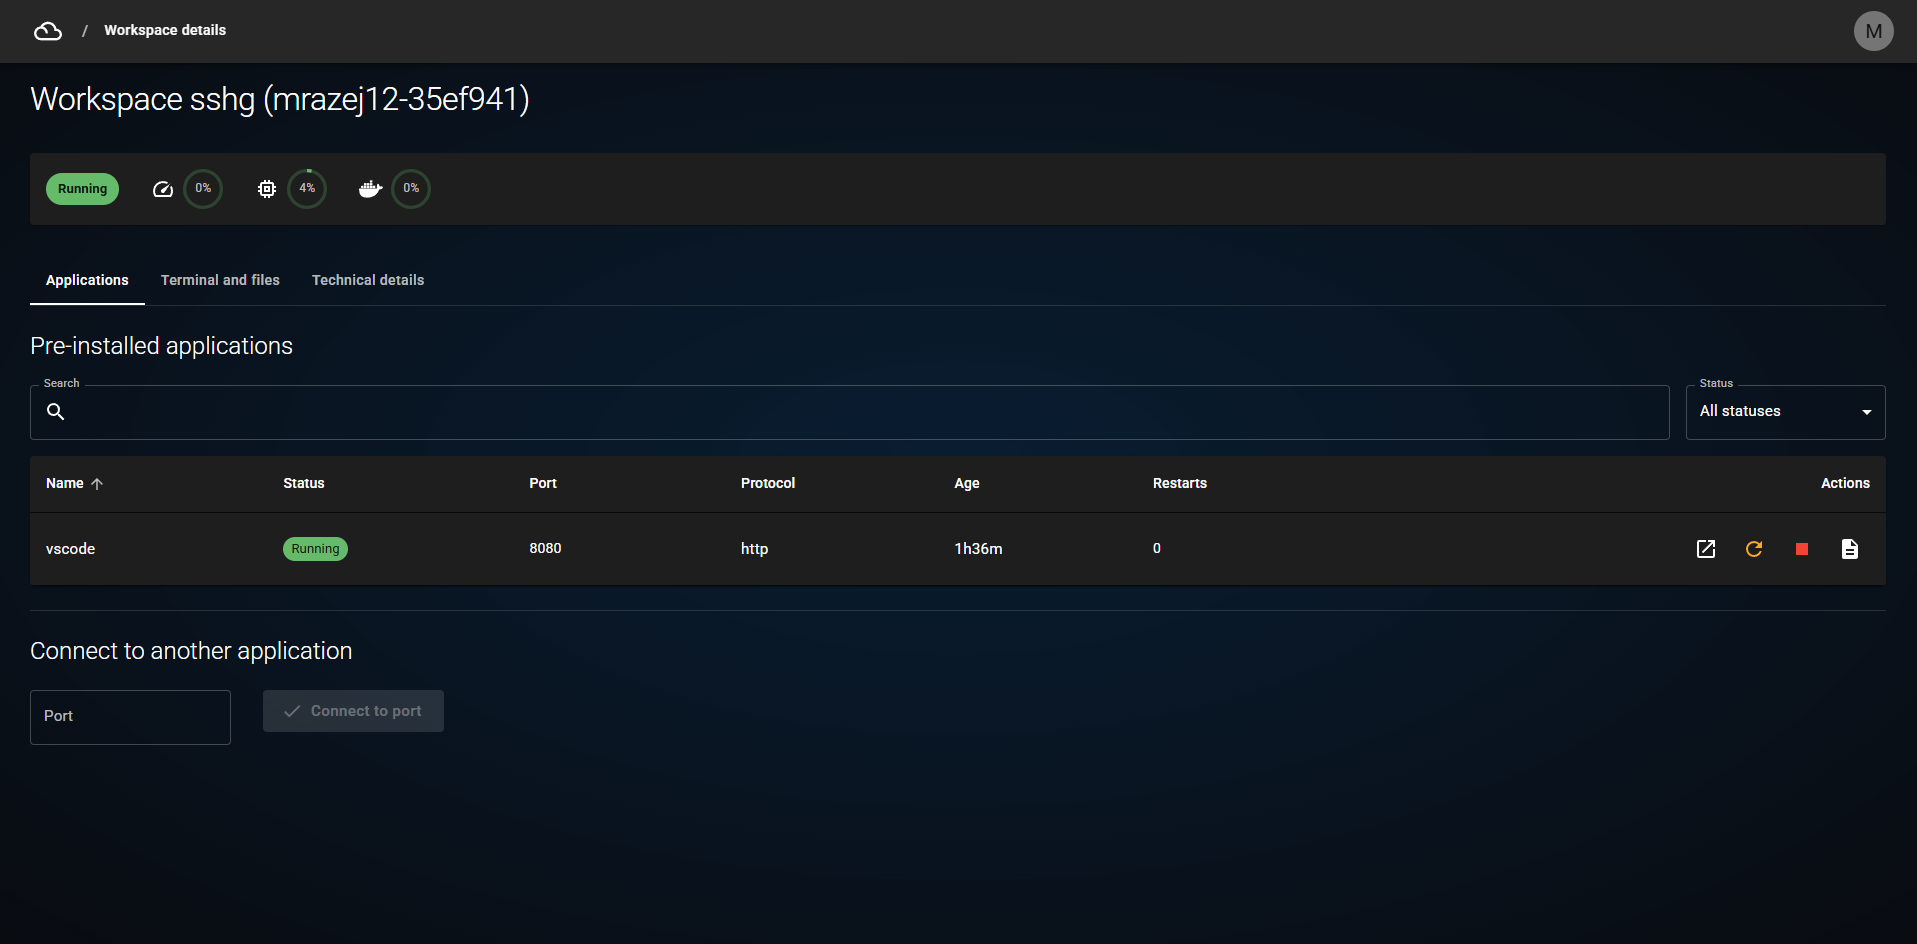
-
Preinstalled applications are listed in the table with available actions.
-
If you launched an application running on a port inside the workspace (e.g. a web server), connect to it by pressing
Connect to portand specifying the port number.
Terminal and Files
-
Select the
Terminal and filestab.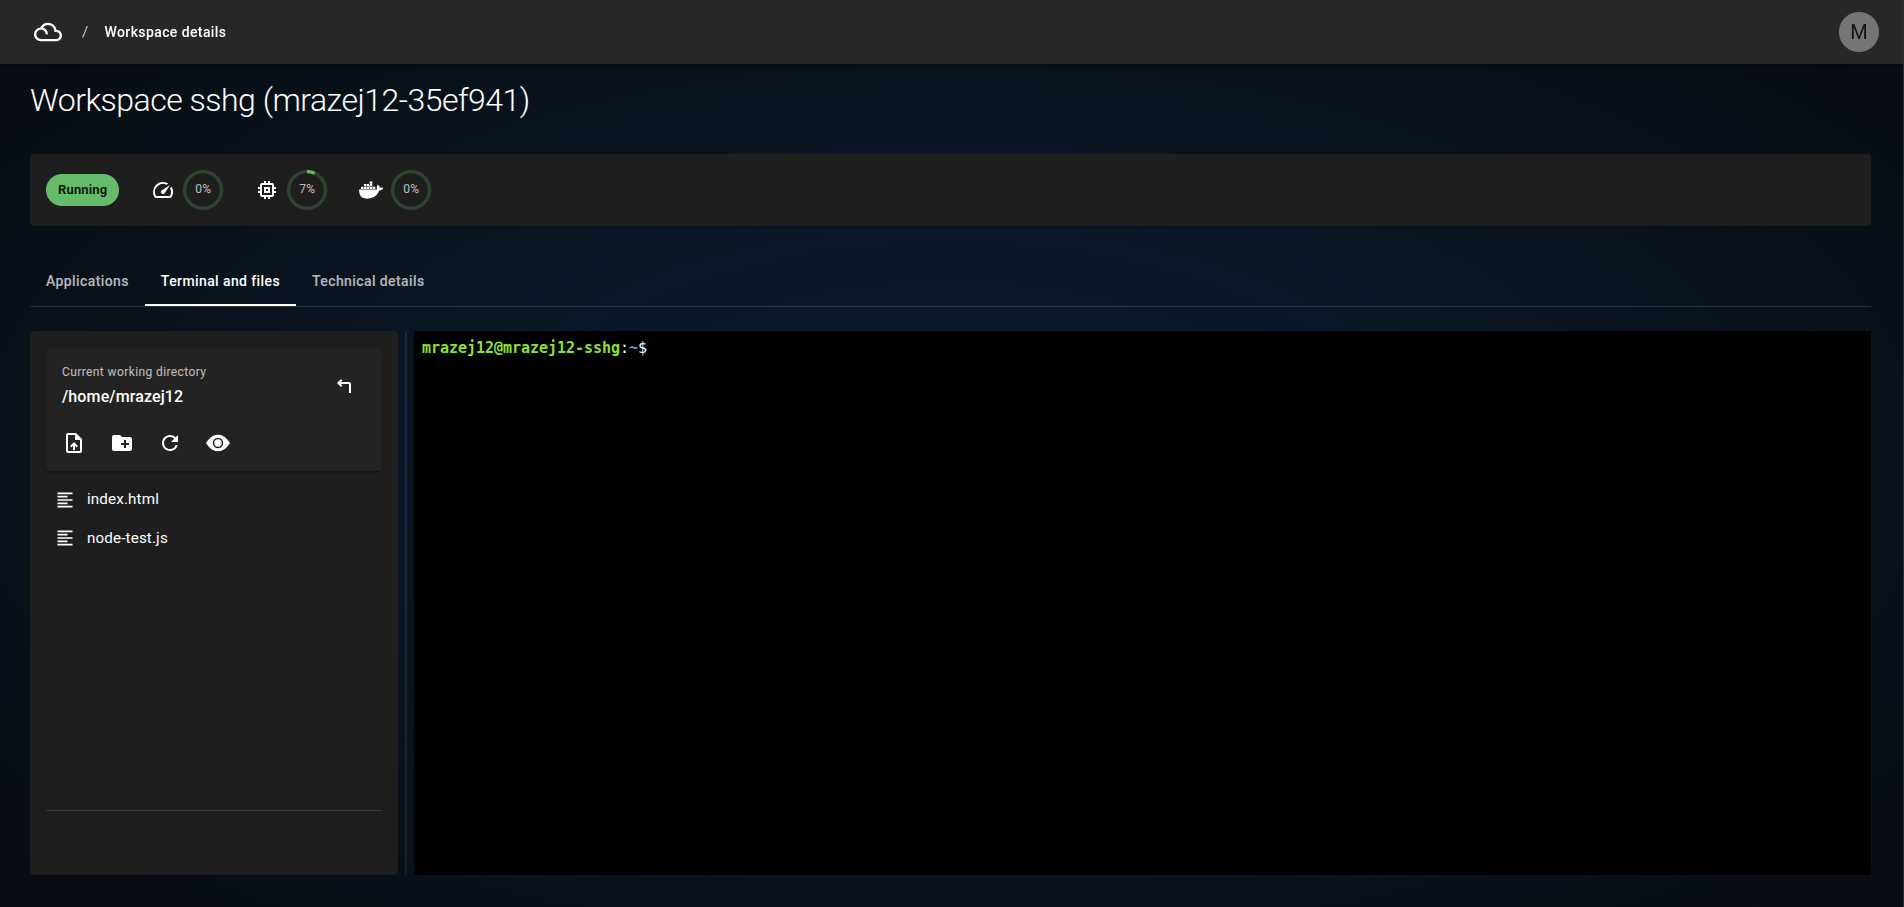
Terminal
- Click the terminal pane to focus it (the cursor starts blinking).
- Supported Linux shortcuts:
Ctrl+C— end a running programCtrl+D— end the session
File Explorer
- The file explorer lets you upload and download files.
- The current working directory is shown at the top of the explorer.
- When no directory is selected, topbar actions (new directory, upload) apply to the current working directory.
- Double-click a directory, or right-click and select
Set as work directory, to make it the current working directory. - Click the arrow icon next to the current working directory to navigate up.
- Create a new directory with the topbar button:
- No selection → created in the current working directory.
- A directory selected → created inside that directory.
- Upload files by:
- Dragging them directly onto a directory.
- Dragging them into the empty space below to upload to the current working directory.
- Pressing the upload button (with or without a directory selected) to open a dialog where you can drop or choose files.
- Right-click a file or directory and choose
Deleteto remove it. - Toggle hidden files with the topbar button.
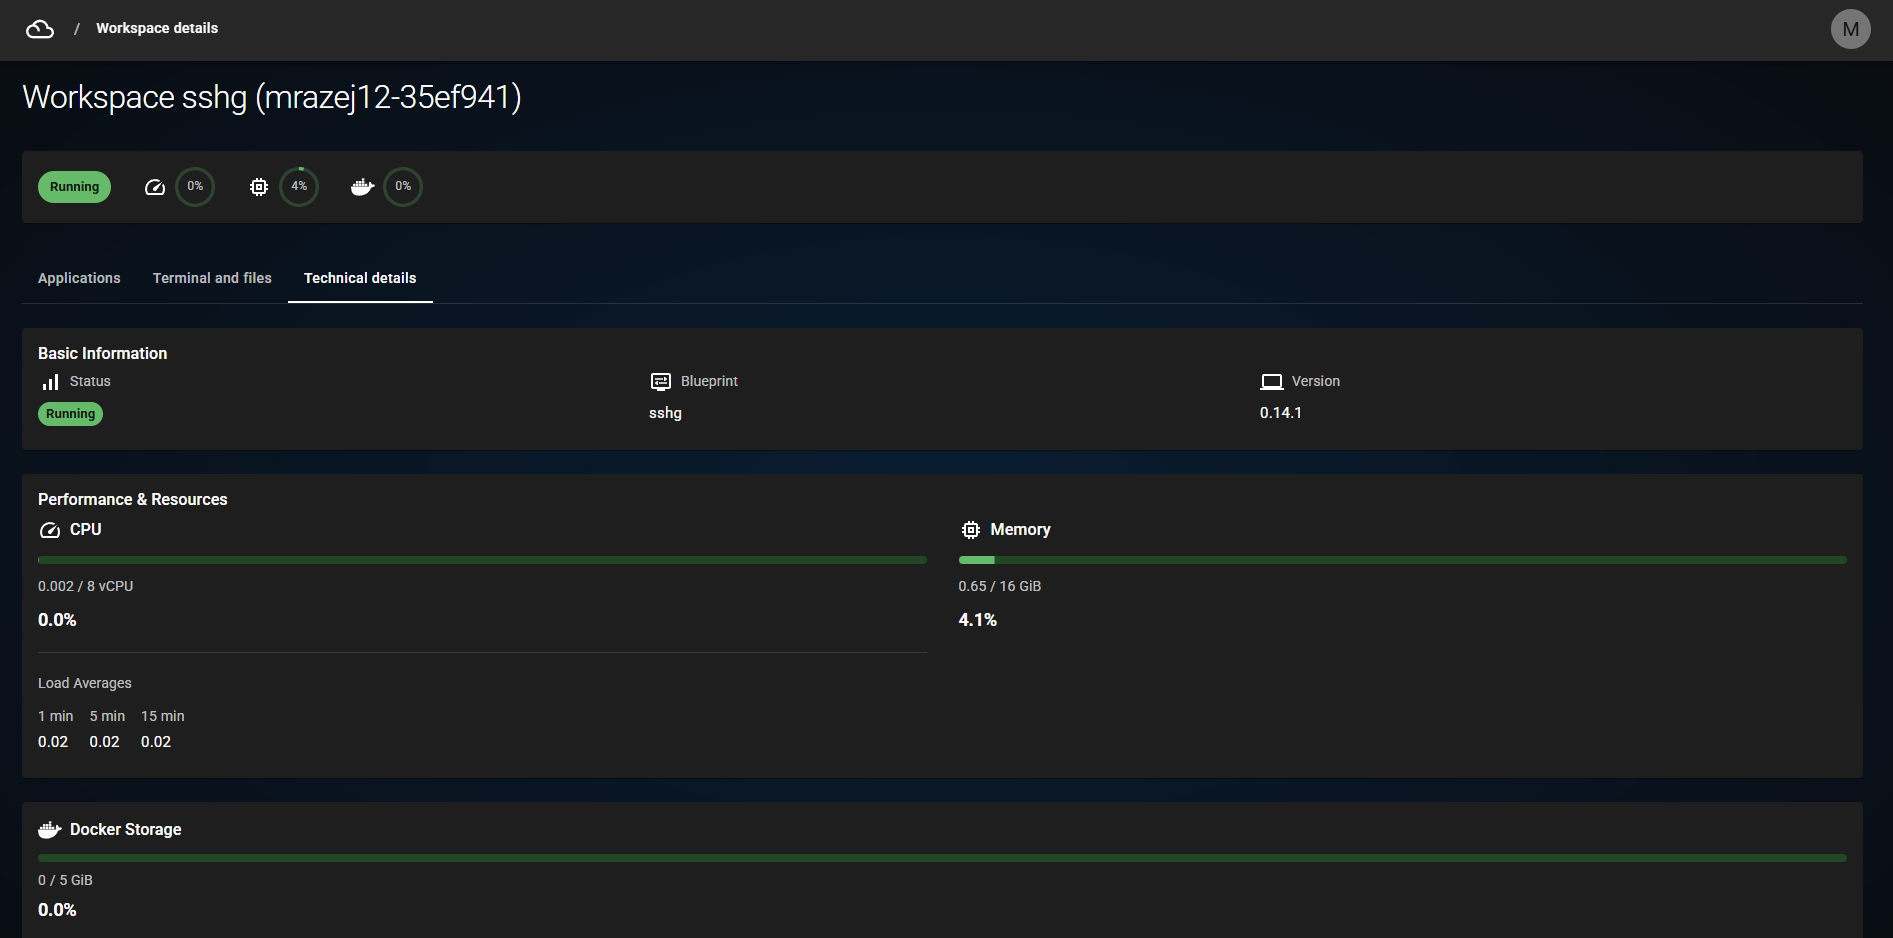
Workspace Status and Technical Details
-
Select the
Technical detailstab to view the workspace status and technical information.